This information has been updated for version 2.0.0, released January 2018.
Overview
The Create Tab
The Auto Tab
Examples of Using the Tool
Sample Files
Features of the Tool
Keyboard Shortcuts
PDF Supports
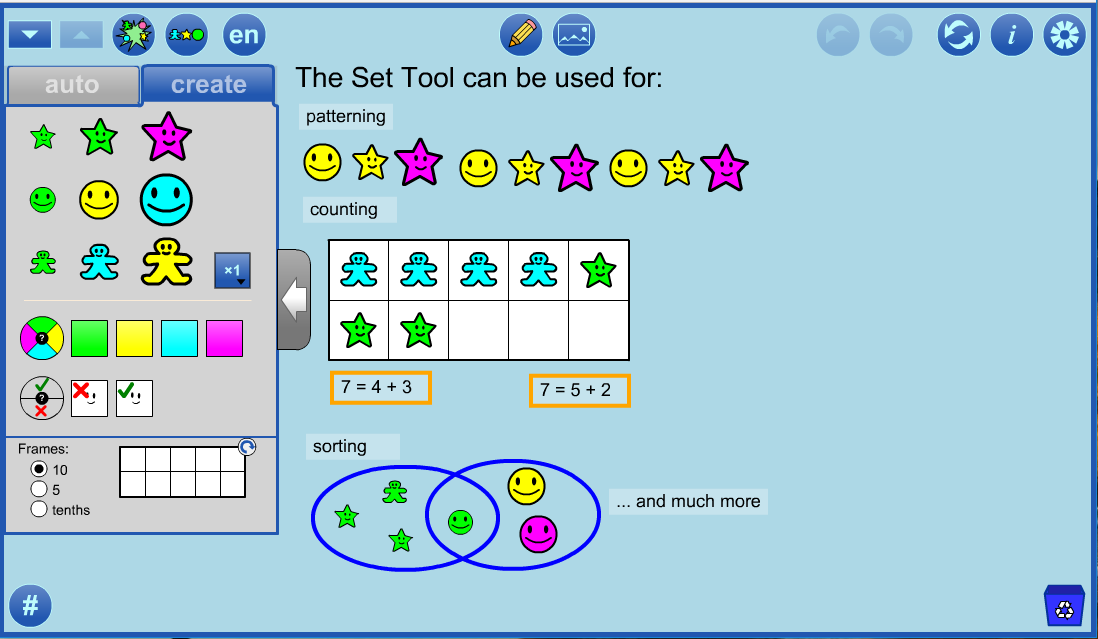
Overview
In the
Set Tool sets of objects can be generated randomly or designed by the user.
- Sort and classify objects.
- Organize objects using number frames (ten frames, five frames, frames of tenths).
- Create patterns.
- Represent, compose and decompose whole numbers, tenths, and fractions.
- Randomly scramble objects to new positions.
- Randomly create new sets of a particular size with specified attributes.
- Explore experimental probability.
The
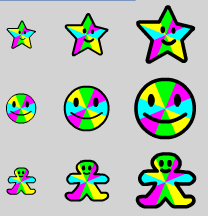
Set Tool allows for up to four attributes to be considered:
- Shape: Star, Circle, and Gingerbread
- Size: Small, Medium and Large
- Colour: Green, Yellow, Blue and Pink
- Face: Shown and Hidden
Take a
screenshot of your work to share with your teacher or add to a portfolio.
You can access a wide variety of
Annotation tools using the

button to communicate your thinking.
You can
insert pictures into the Tool using the

button.
As of V2.0.0, it is possible to
save and open files. This feature allows students to save their work and return at a later time to complete it.
It also facilitates sharing of completed work with a peer or teacher. See the
sample files provided below.
top
The Create Tab - User Generated Sets
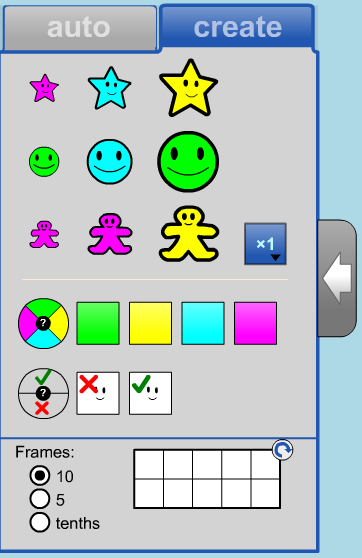
Nine cloner shapes representing all the possible shapes and sizes are presented in the first section of the panel.
The nine shapes have faces shown and are randomly coloured.
Drag any of them from the panel to the workspace.
Use the multiplier to quickly create 1, 2, 5 or 10 copies of a shape.
Click on any colour swatch to change all shapes in the tab to that colour.
Click on the random colour wheel

to randomize the colour of shapes.
Click on a face swatch to make all the shapes either have a face or not have a face.
Click on the random face wheel

to randomize the face feature.
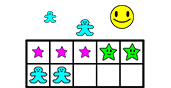
Drag a number frame into the workspace from the third section of the panel.
Use the radio buttons to choose between ten frames, five frames and frames of tenths (dashed division lines).
Click on the rotate button to switch between horizontal and vertical frames.
Clicking on the
random attribute buttons causes the shapes in the panel to change to reflect your choice(s).
The actual attribute is randomized as the shape is dragged to the workspace. ||
Random Colour ||
Random Facedness ||
Random Colour and Facedness ||
You can also change an
individual cloner by clicking on it and selecting the desired colour and face.

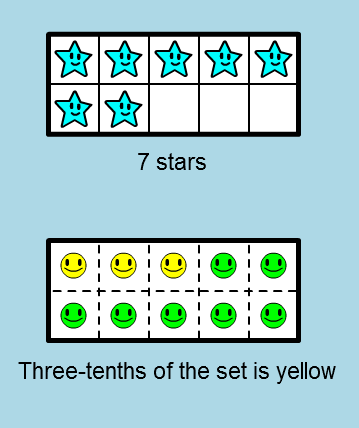
If you use dashed internal divisions in a frame, it is called a
frame of tenths - the full frame representing a whole in that case.
 top
top
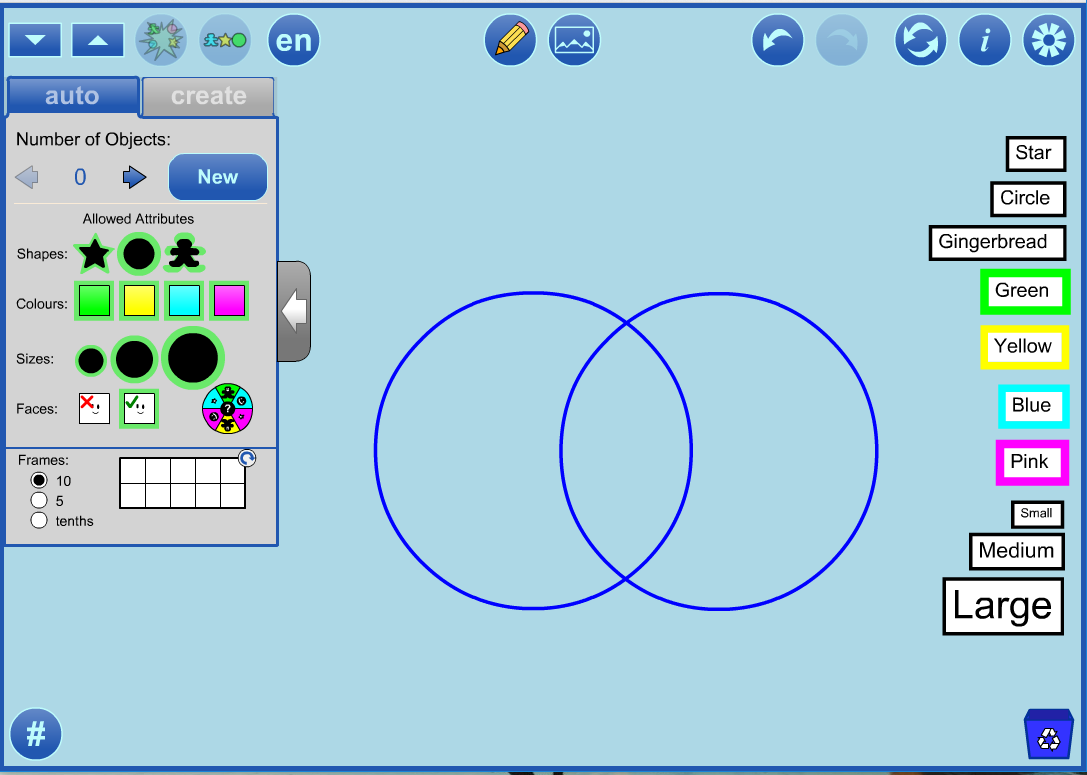
The Auto Tab - Randomly Generated Sets
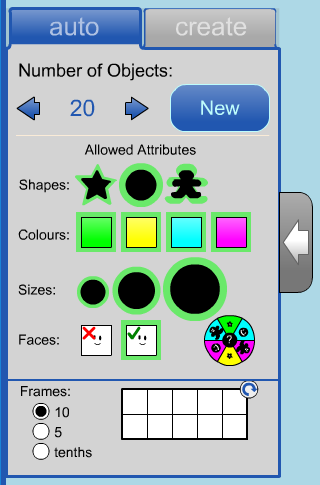
Click the left or right arrows to decrease or increase the number of objects on the workspace.
Enter a number directly in the text field to change the number of objects on the workspace.
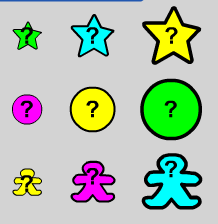
Click the New button in the first section of the panel to create a random set using the allowed attributes from the second section.
Click on the shape icons to restrict which shapes will be used to create random new objects.
Click on the colour squares to restrict which colours will be used to create random new objects.
Click on the size circles to restrict which sizes will be used to create random new objects.
Click on the face squares to restrict whether new objects can have faces or not.
Click on the random attributes wheel

to randomize the objects currently in the workspace based on the allowed attributes that are highlighted.
Notice that you can also drag number frames to the workspace from the auto tab.
top
Examples Using The Set Tool
1. Students might be asked to create sets of a certain size, like 10.
They can use the Scramble Position button

, which we liken to kicking the desk leg, to work on
Conservation of Quantity; 10 stays 10!
2. Simple
patterns can be created and extended.

or
 |
| On desktop, click to open this file |
3.
Operations can be modelled.
The multiplier allows multiple shapes to be dragged onto the workspace in one action. Here, the multiplier was set to 10, and in two drags 20 gingerbreads are placed in the workspace.
Next, the multiplier was set to 5, and five more were added. Two were selected and deleted, using the recycle bin, leaving 23.
The annotation tool is used and the take-away meaning of subtraction illustrated. The three groups of 5 that are left are counted to get the difference.
Notice how anchors of 5 and 10 help solve this problem.
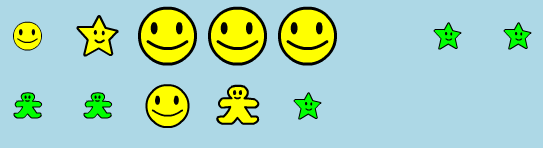
4. Young students are often asked to
sort sets by attribute. The auto tab allows for random sets to be created quickly.
Here, 24 objects are created automatically. This student has demonstrated both their ability to sort by one attribute (colour) and to describe one way to decompose 24.
Sorting by different attributes would support students in seeing alternate ways to decompose 24.
This student’s sort is a pictograph on its head!
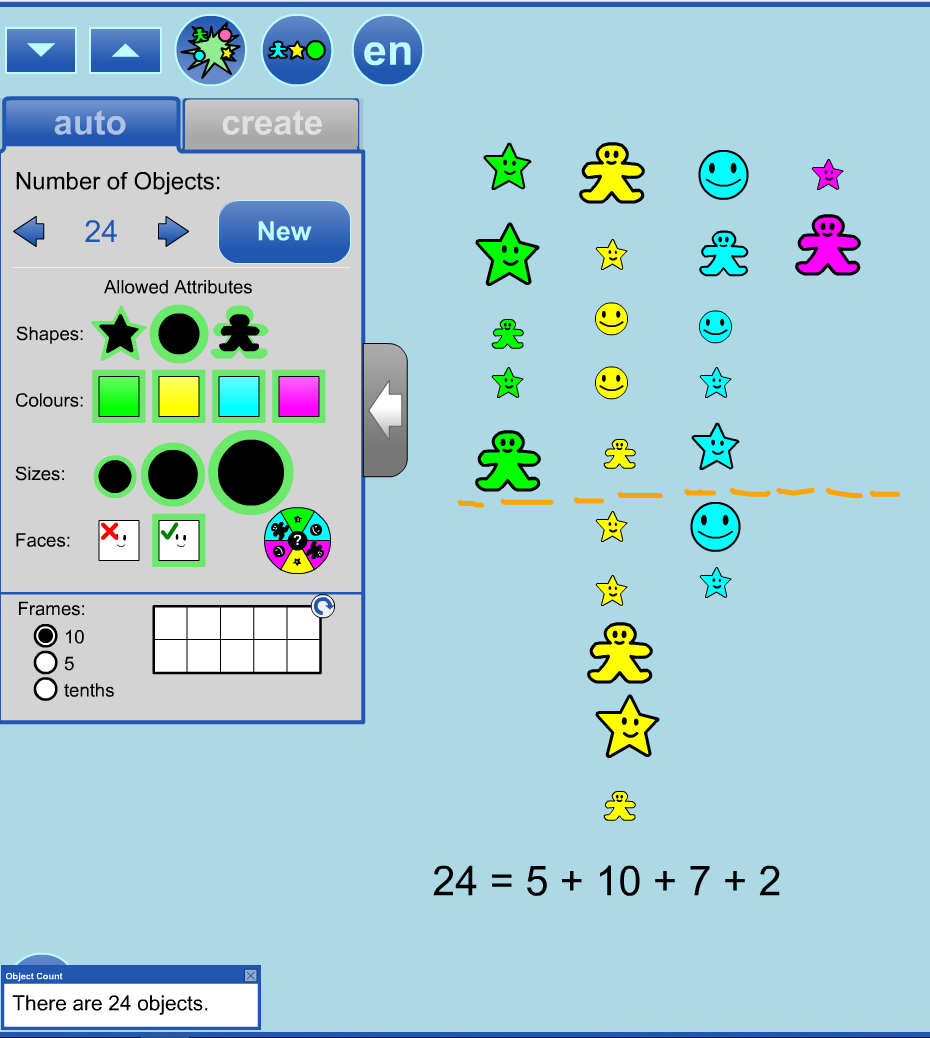
The Count button

can be used as a check, which is especially useful when the student has created the set themselves.
Students will get a feeling for variability as they compare their results to other students and realize that although the colours are equally likely to occur; they do not often occur equally.
Here we would expect 6 of each colour (24 divided by 4 possible colours). Are students surprised to see 2 pink and 10 yellow?
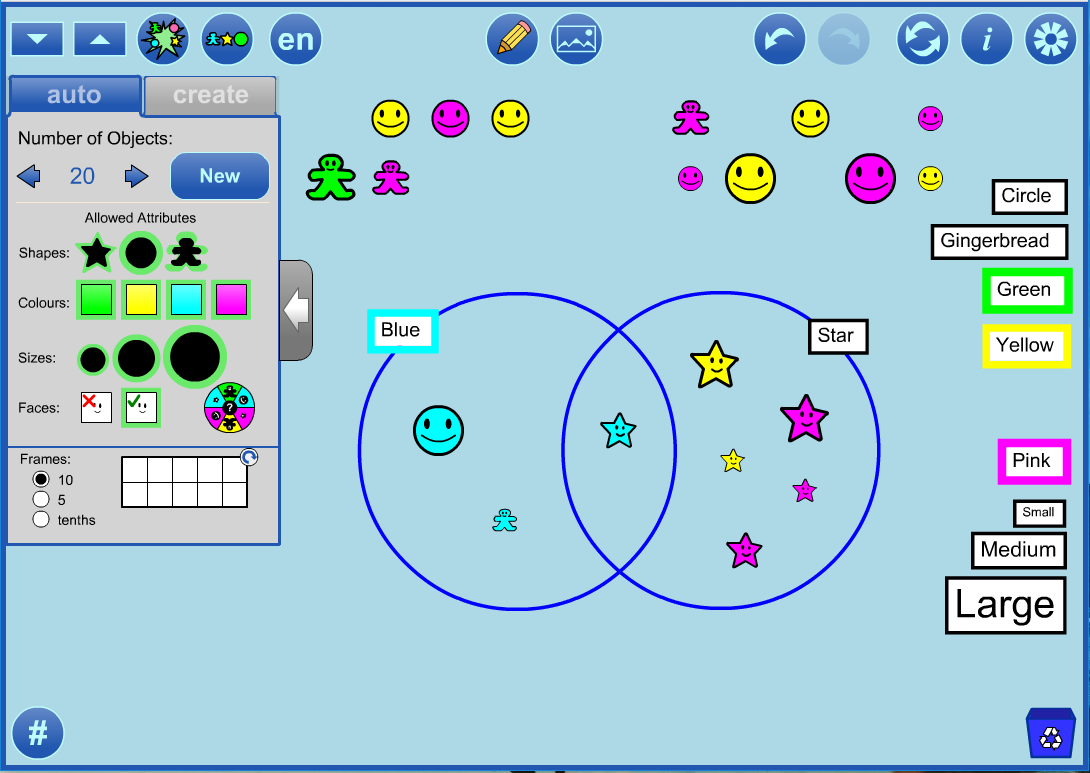
5. Later, students might use a
Venn Diagram to
sort based on two attributes.
The teacher shares the Venn Diagram Template file (
see below) with his students.
Note: This file was created using the annotation tools and then saved.
Students are instructed use settings

to open the file and generate a set of random objects to sort.
This student created a set of 20 random objects using the auto tab.
They then pressed the Auto Arrange Button

to organize the objects near the top of the workspace.
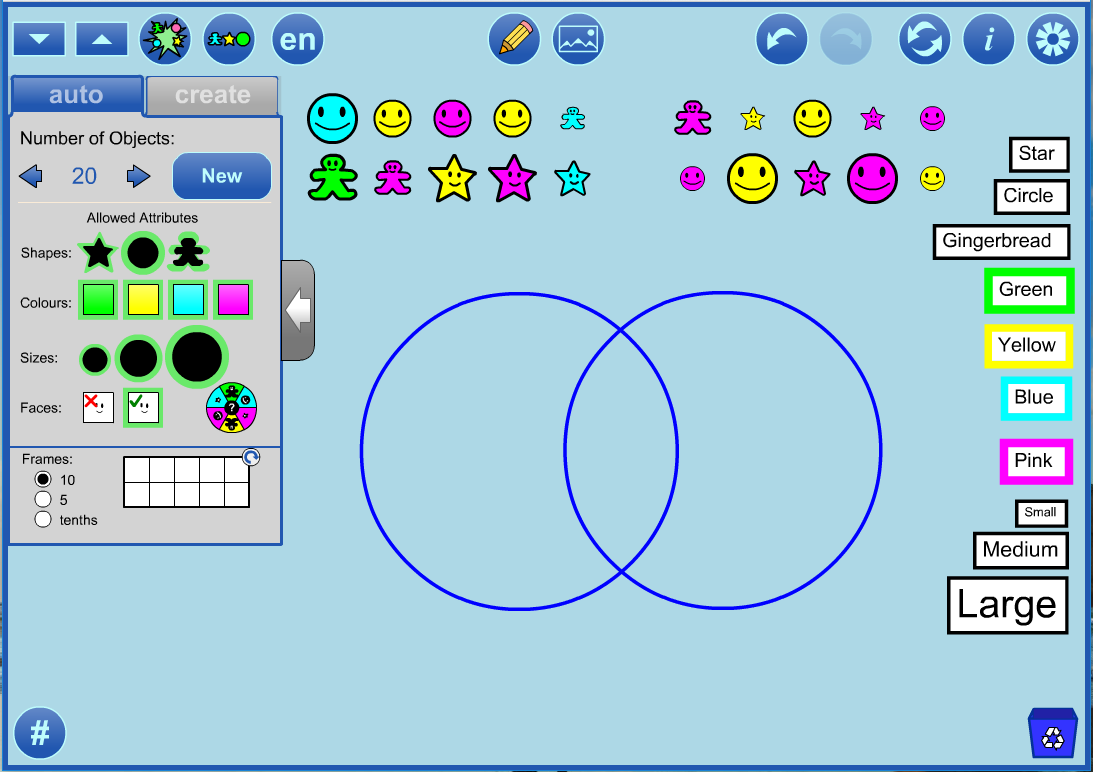
First, the student decided to sort using
blue as one attribute and
star as the second attribute.
They clicked the annotation tool button and dragged the pre-made labels to the circles.
They then turned annotation off (to avoid unintentionally dragging the circles or labels) and dragged the objects to the appropriate regions.
The student then decided to sort these same objects using the attributes
large and
circle.

Students could save their work and the teacher could open the saved files and discuss the many different ways of sorting various sets.
It would be interesting to compare two different sets that were sorted using the same criteria. One way to compare student work would be to take screen shots
and import the images
into the tool so that the sorts could be viewed side by side.
Alternatively, students could be asked to press the
New button to generate a different random set of 20 items.
Students could then sort this new set using their original sorting rule and compare the results.
Students will develop their feeling for variability as they compare the results for different randomly generated sets.
In a set of 20 randomly generated objects with the selected attributes, we would expect 6 or 7 stars (20 divided by 3 possible shapes) with
each colour represented 1 or 2 times (4 colours evenly distributed among the 6 or 7 stars).
In the set pictured above, there are in fact 6 stars but none of them are green.
A grade 12 student could calculate some of the
theoretical probabilities and compare them to the actual experimental results.
For the blue/star example, the probability that an object is placed outside the rings is 1/2. (*) This means that you would expect to have only 10 objects outside.
This sample has 12 objects outside due to the underrepresentation of blue objects (3 blues compared to 5 expected).
(*) In case you're wondering where the 1/2 came from ...
The probability that an object is outside the Venn diagram in the blue/star example
= 1 - Probability( object inside the Venn diagram)
= 1 - [ Probably(object is Blue) + Probably(object is a Star) - Probability(object is a Blue Star) ]
= 1 - [ 1/4 + 1/3 - 1/12]
= 1 - 6/12
= 1/2
6. Feeling Blue -
Exploring Probability
Students might be asked to explore how much the number of blue shapes differs from the expected. Even choosing a set as small as 12 objects is interesting.
There are four colours, so each would be expected to show up 3 times. If students create random sets of 12 will they ever observe a set that is missing a colour?
Will they ever get all twelve objects to be the same colour?
Would they think that this set was the result of a random generation? (It is!)
Imagine the following investigation: a student opens up the Set Tool and then the auto tab. She types 12 for the number of objects and presses enter.
Twelve random objects are displayed. She then presses the Auto Arrange button
to line them up.
She makes note of the number of them that are blue and then selects all the objects by drawing a marquee rectangle around them.
This makes the Copy button appear as well as the Change Selected Objects button. Pressing on the latter button opens a dialog that allows changes to the attributes of the
selected objects.
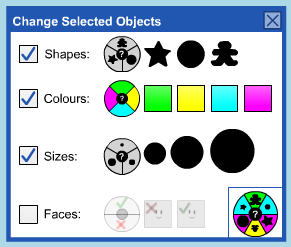
Click on the desired icon to change to a specific value like star, yellow, medium or faceless.
Click on the randomize wheel in any row to randomly assign values for that attribute.
Click on the randomize wheel in the bottom right corner to randomize based on all of the checked attributes.
Click on the check box at the beginning of the row to include/exclude that attribute.
For this investigation, the student clicks on the random Colour button repeatedly, continuing to make note of the number of blue objects in the set.
She records the results using the annotation tool and considers questions like:
- Are each of the possible values equally likely? If not, which number of blue objects would you expect to occur most frequently?
- How does your tally chart compare to others in your class? Does it make sense to combine them into one big tally chart?
- Do you think it is equally likely to have 0 blue objects as it is to have 6?
- What percentage of sets have 3 or fewer blues?
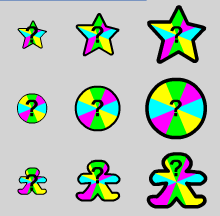
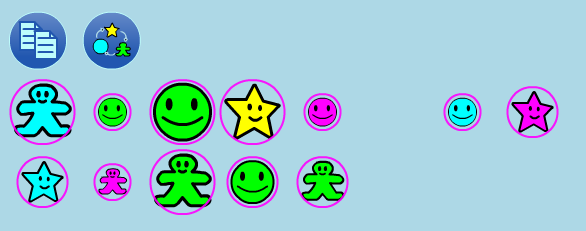
7. Students could be asked to
create and count all the object possibilities.
To create the above, one of each of the nine cloners is dragged into the workspace maintaining the 3 by 3 array.
This group is then selected and coloured green using the Change Selected Objects button.

It is then copied to create the yellow, blue and pink possibilities. Then the whole lot is copied, positioned and the smile wiped off their faces.
Students in later grades might calculate the total number of possibilities using 3 x 3 x 4 x 2.
This construction allows students to see the 3 times 3 to start, then the multiplication by 4 as the colours are considered, and then the doubling when facedness is addressed.
The eight copies of 9 elements form a 6 by 12 array which is decomposed into friendly numbers in order to determine the product. The annotation tools help to make the thinking visible.
top
Sample Files (for V2.0.0 and beyond)
To access a sample file:
-
click the link in the Sample column (desktop only), or
-
use the Open WWW button
 in the Settings dialog and supply the URL, or
-
download the file from the URL column (right-click and save locally on desktop, hard tap on mobile) and use the Open button
 in the tool, or
-
add the mathies sample files Google drive folder to "My Drive" which allows convenient access on all devices.
See the
File Operations page for more details.
top
Features of the Tool
Buttons
|
|
|
Annotation Tool
Hide/Show a wide variety of Annotation Tools which can be used to communicate your thinking.
|
|
Insert Image Button
You can insert images into the tool. More details.
|
|
Undo/Redo
Step backward or forward through your actions with the tool.
This feature is not only useful for backtracking when a misstep is made, it enables a student to demonstrate their work from the start to the finish.
They press Undo until they are at the start of their solution and then press Redo repeatedly, explaining each step.
|
|
Reset
Delete all your work and return the tool to its starting state.
|
|
Information
Access a link to this support page, a feedback form as well as copyright details and version number.
|
|
Settings
Control the way overlapping ten frames behave.
Decide whether or not annotation will scale when objects change size.
Change background colour.
Restore the tool to its default settings.
Save and open and import files. More details. See the sample files provided above.
|
|
Recycle
(in the work space)
Click to clear the entire work space.
Alternatively, drag items to the recycle bin to remove them.
|
|
Object Size
Increase / decrease object sizes.
|
|
Copy
Make a copy of the selected objects.
|
|
Change Selected Objects
Press this button to bring up a panel that will allow you to modify the attributes of the selected objects.
You can choose specific shapes, colours, sizes and whether to show a face.
It is also possible to randomize any attribute or combination of selected attributes using the randomize buttons.
|
|
Auto Arrange
Line up all objects along the top of the workspace.
Objects are grouped in sets of either 5 or 10 depending on which type of frame is currently selected in the panel.
|
|
Scramble Position
Randomly distribute all objects within the workspace.
|
|
Object Count
Check to see how many objects are in the workspace.
|
Other Functionality
|
|
|
Multiple Select
Draw a marquee around an object, or group of objects to select it.
Click an object to add to or remove from selection.
Selected objects can be moved, copied or recycled as a group.
|
top
Keyboard Shortcuts
On the desktop version of this tool, the standard
Keyboard Shortcuts have been implemented.
Set specific keyboard shortcuts are as follows:
SPACE + 5 - Select five frames option in the Selection Panel
SPACE + 0 - Select ten frames option in the Selection Panel
SPACE + N - Create a new random set with the number of objects specified by the value in the auto tab.
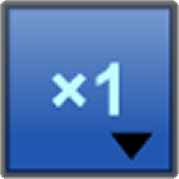
Type 1,2,5, or 0 (for 10) to change the number of copies to drag
PDF Supports
mathies Set Learning Tool Tip Sheet
top